(Prefer to watch this tutorial? Click here!)
1. Create a new project
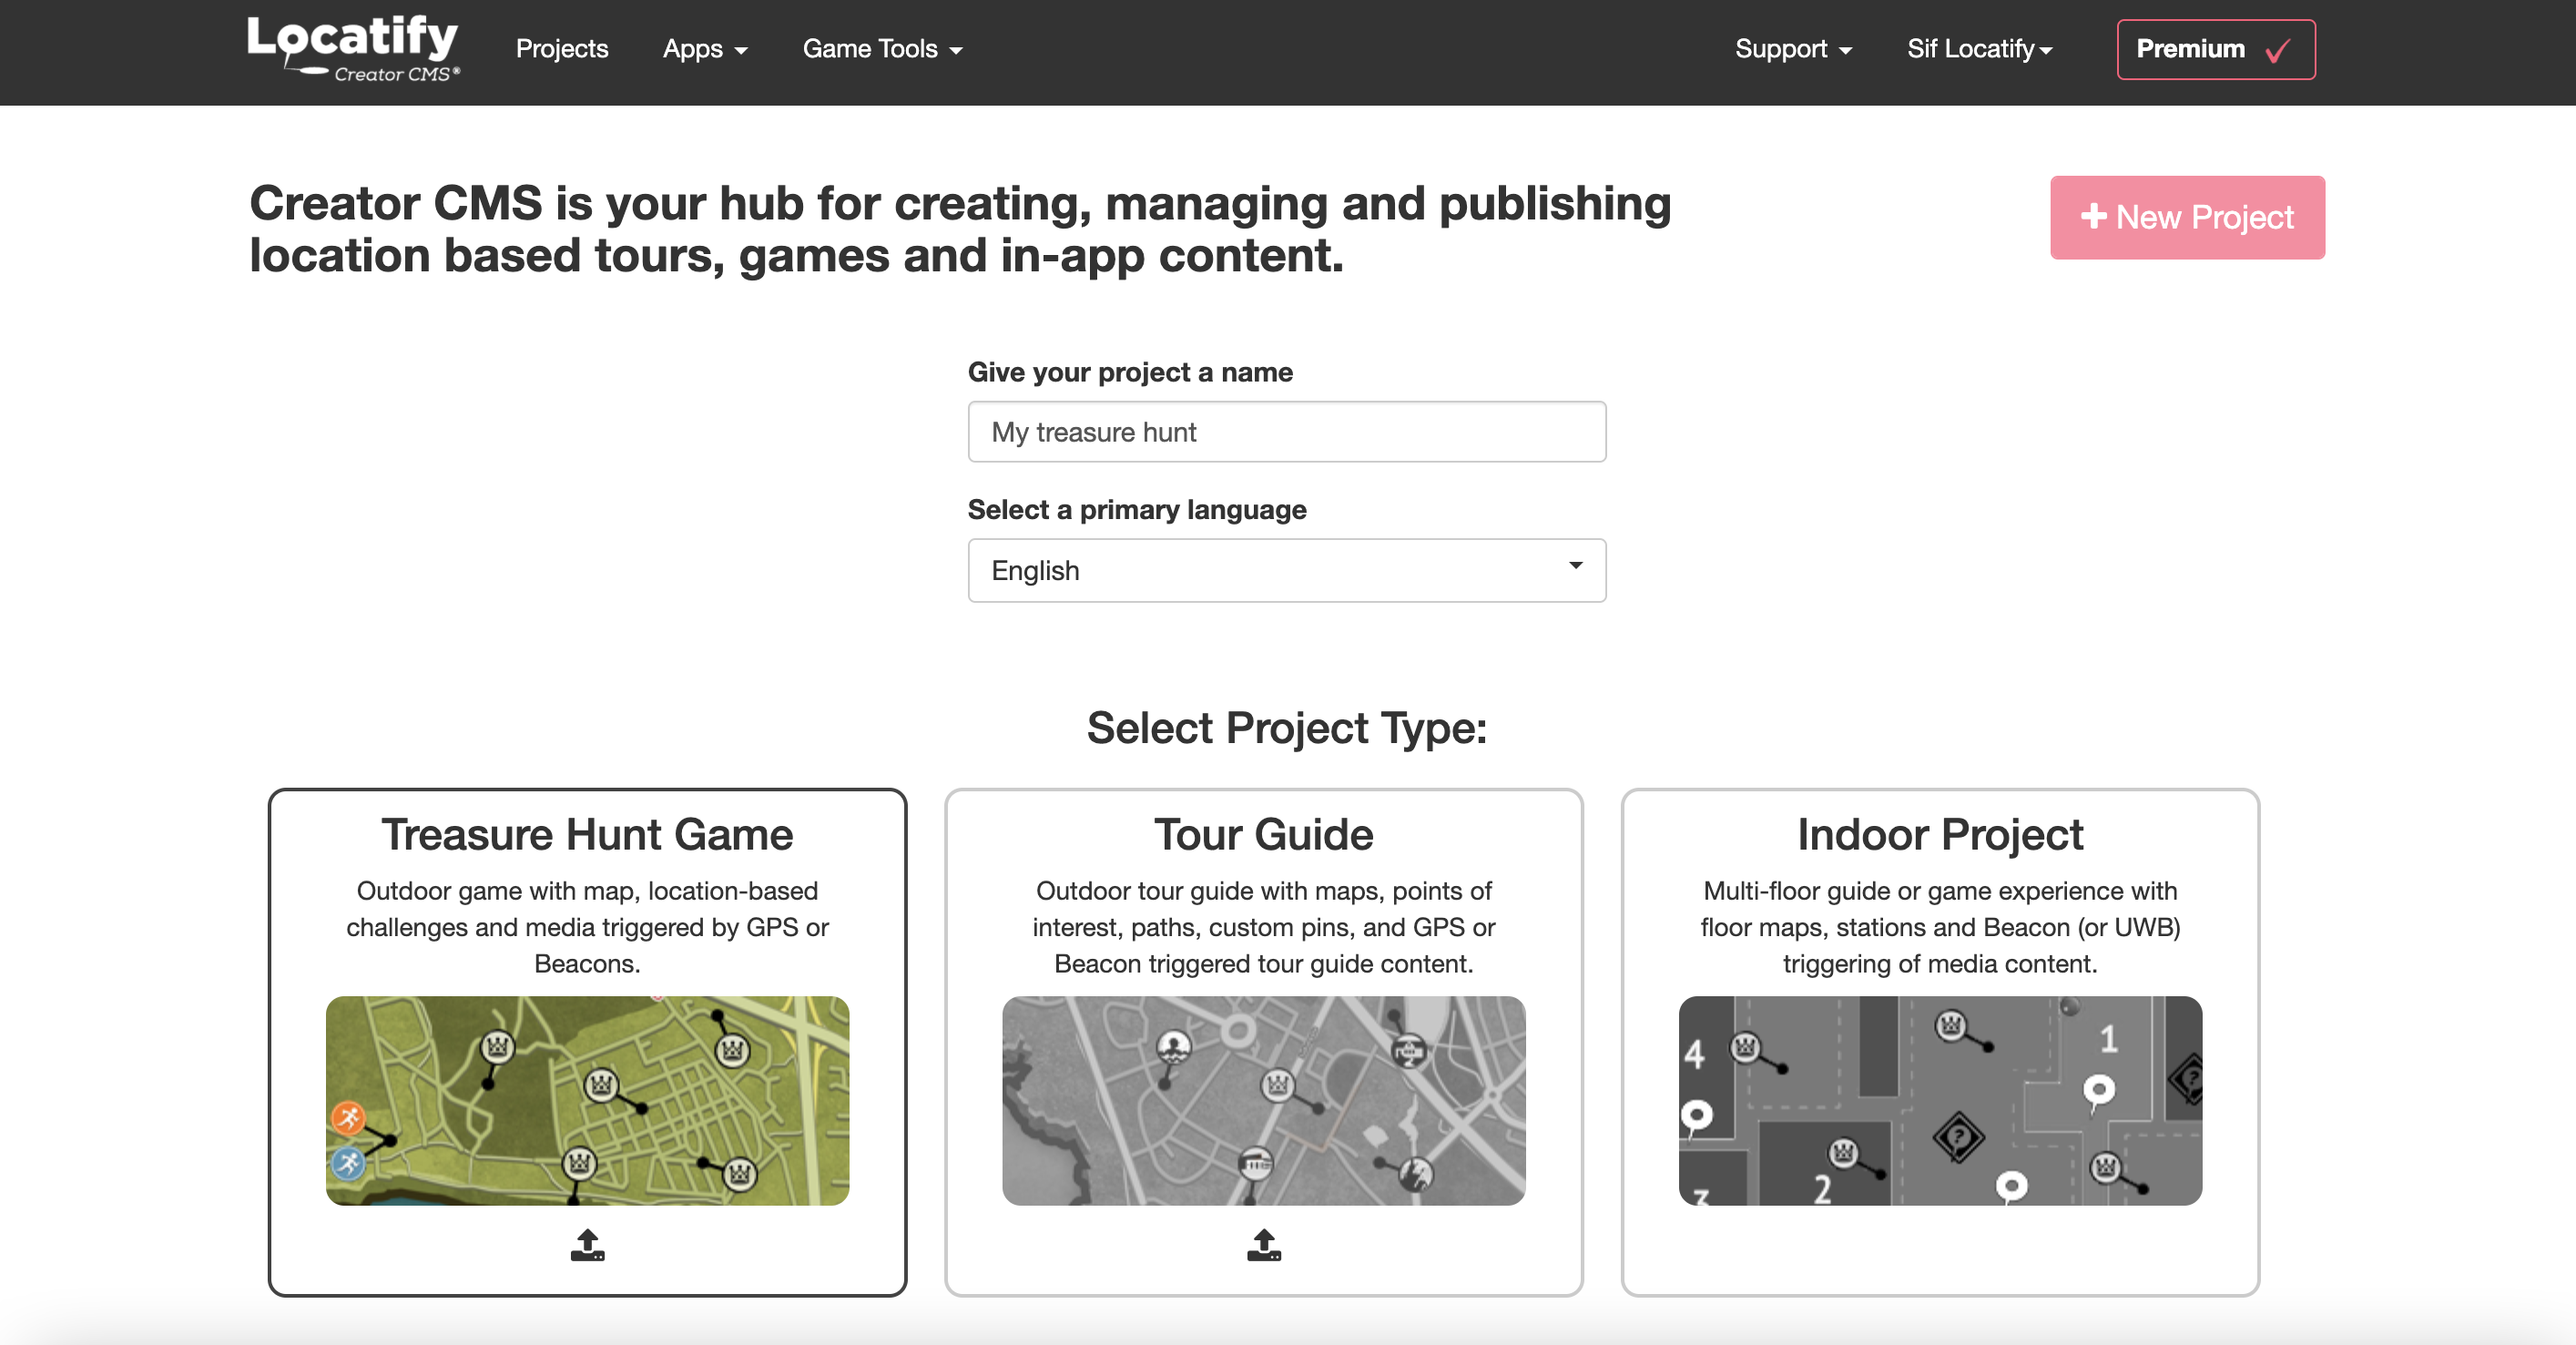
If you haven’t done so already, make a free account with us and login. You’ll be taken to a dashboard from which you can create projects.
Select New Project, give your project a name, choose your primary language (you can add others later), and select Treasure hunt game.
2. Add treasure point
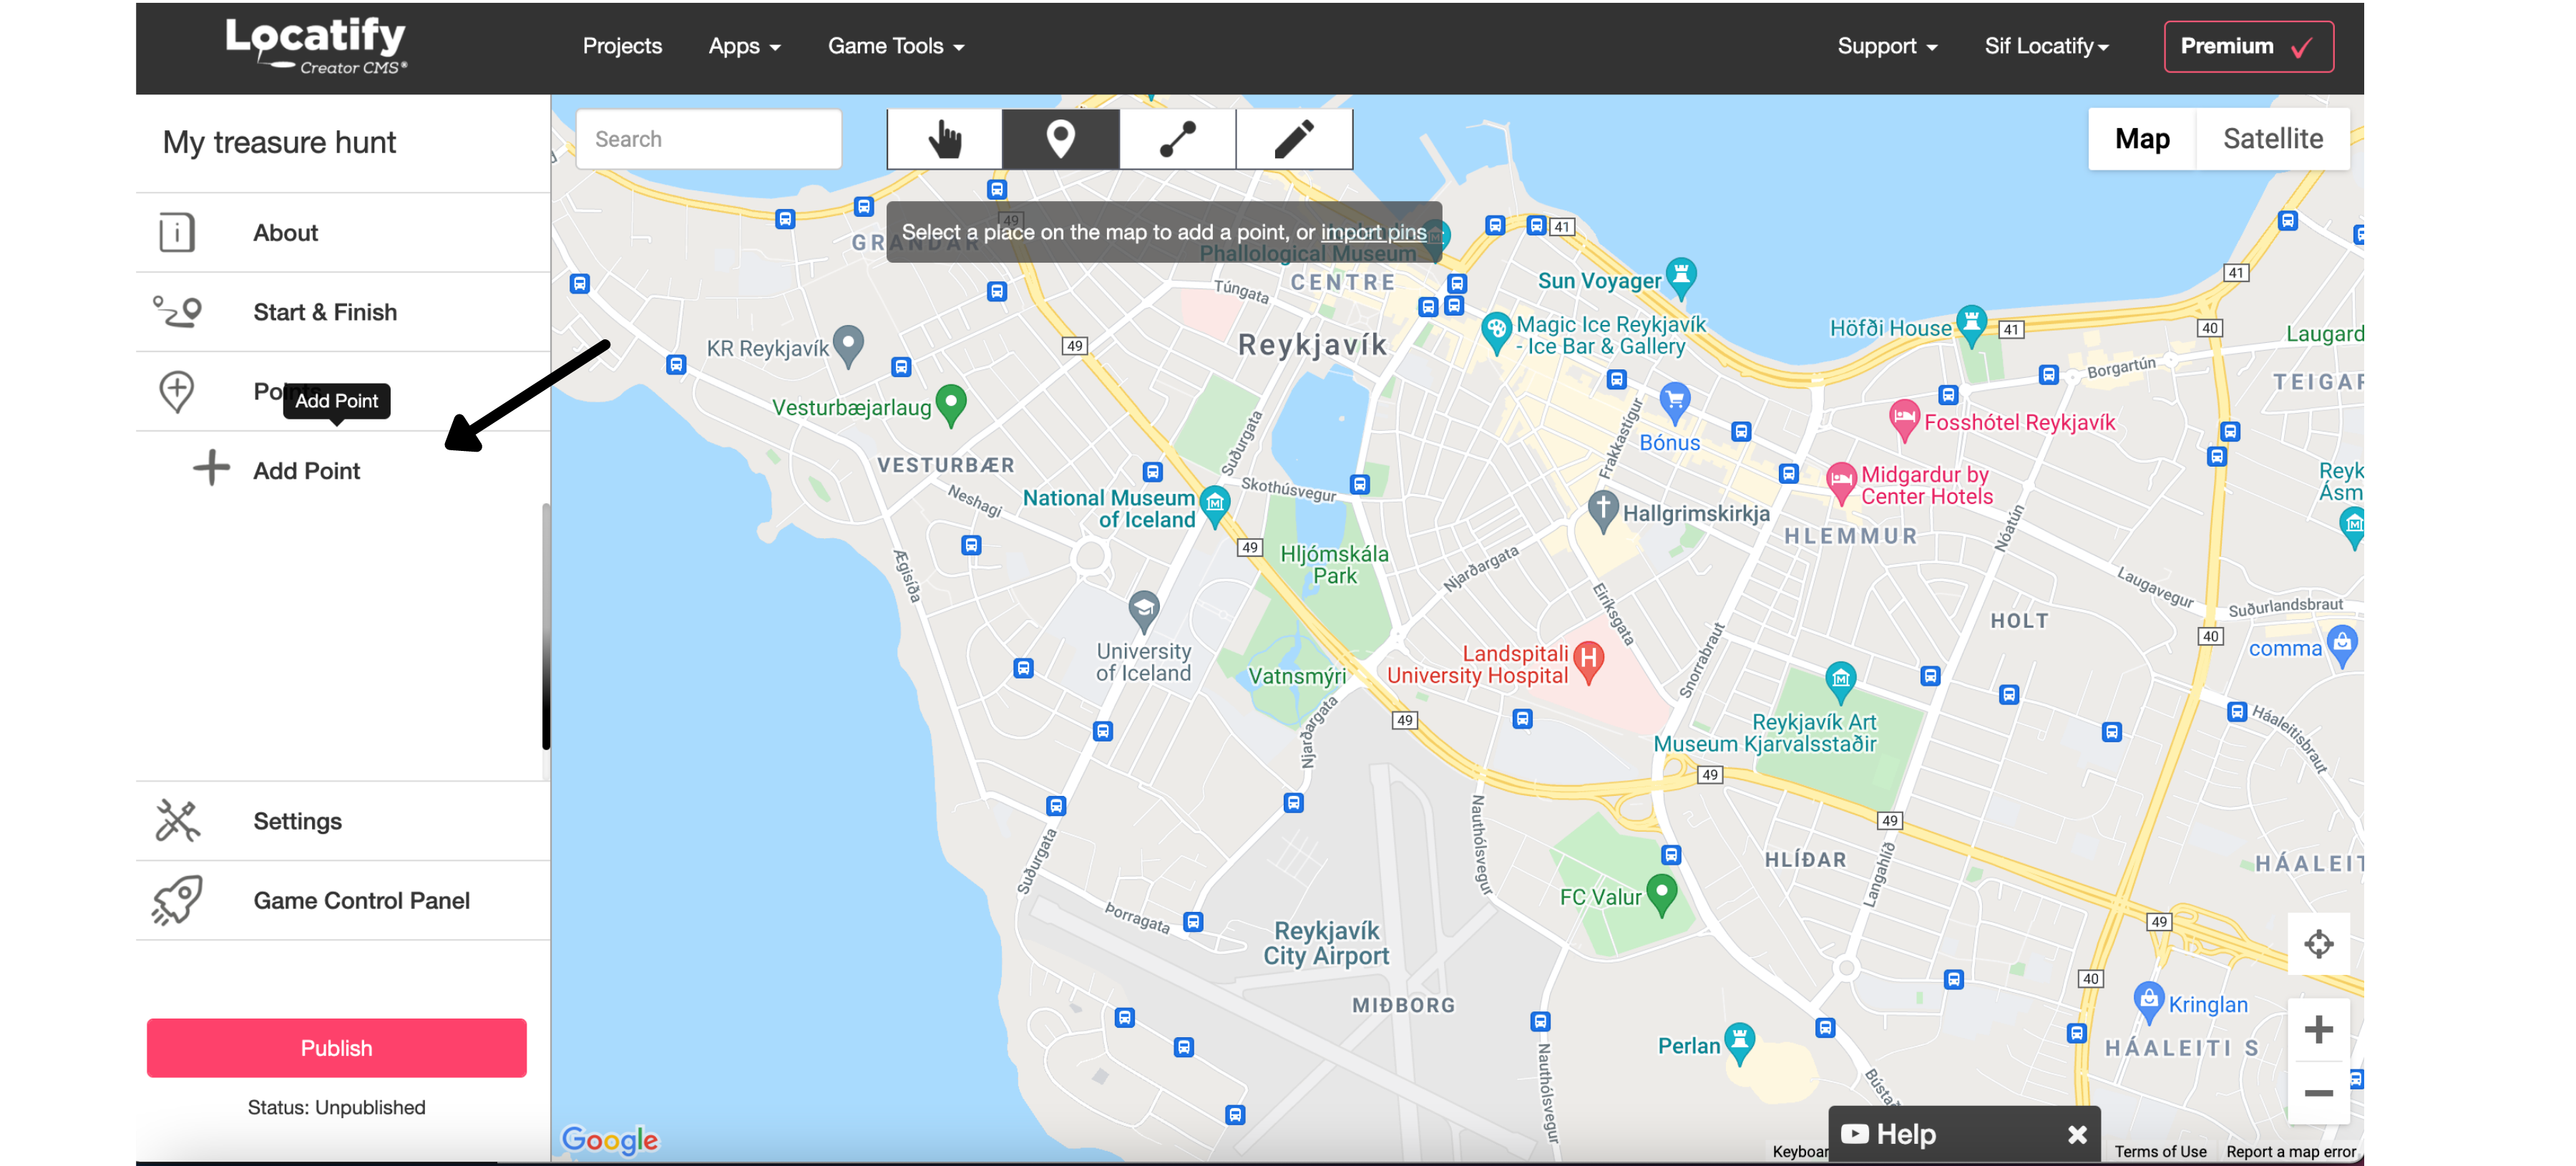
You can add and manage your treasure points from the left panel here.
Select Add point and click again on the map to place it where you want it. The green area around the point visualises the triggering radius.
Click on the point itself to add information and challenges to it.
3. Add content
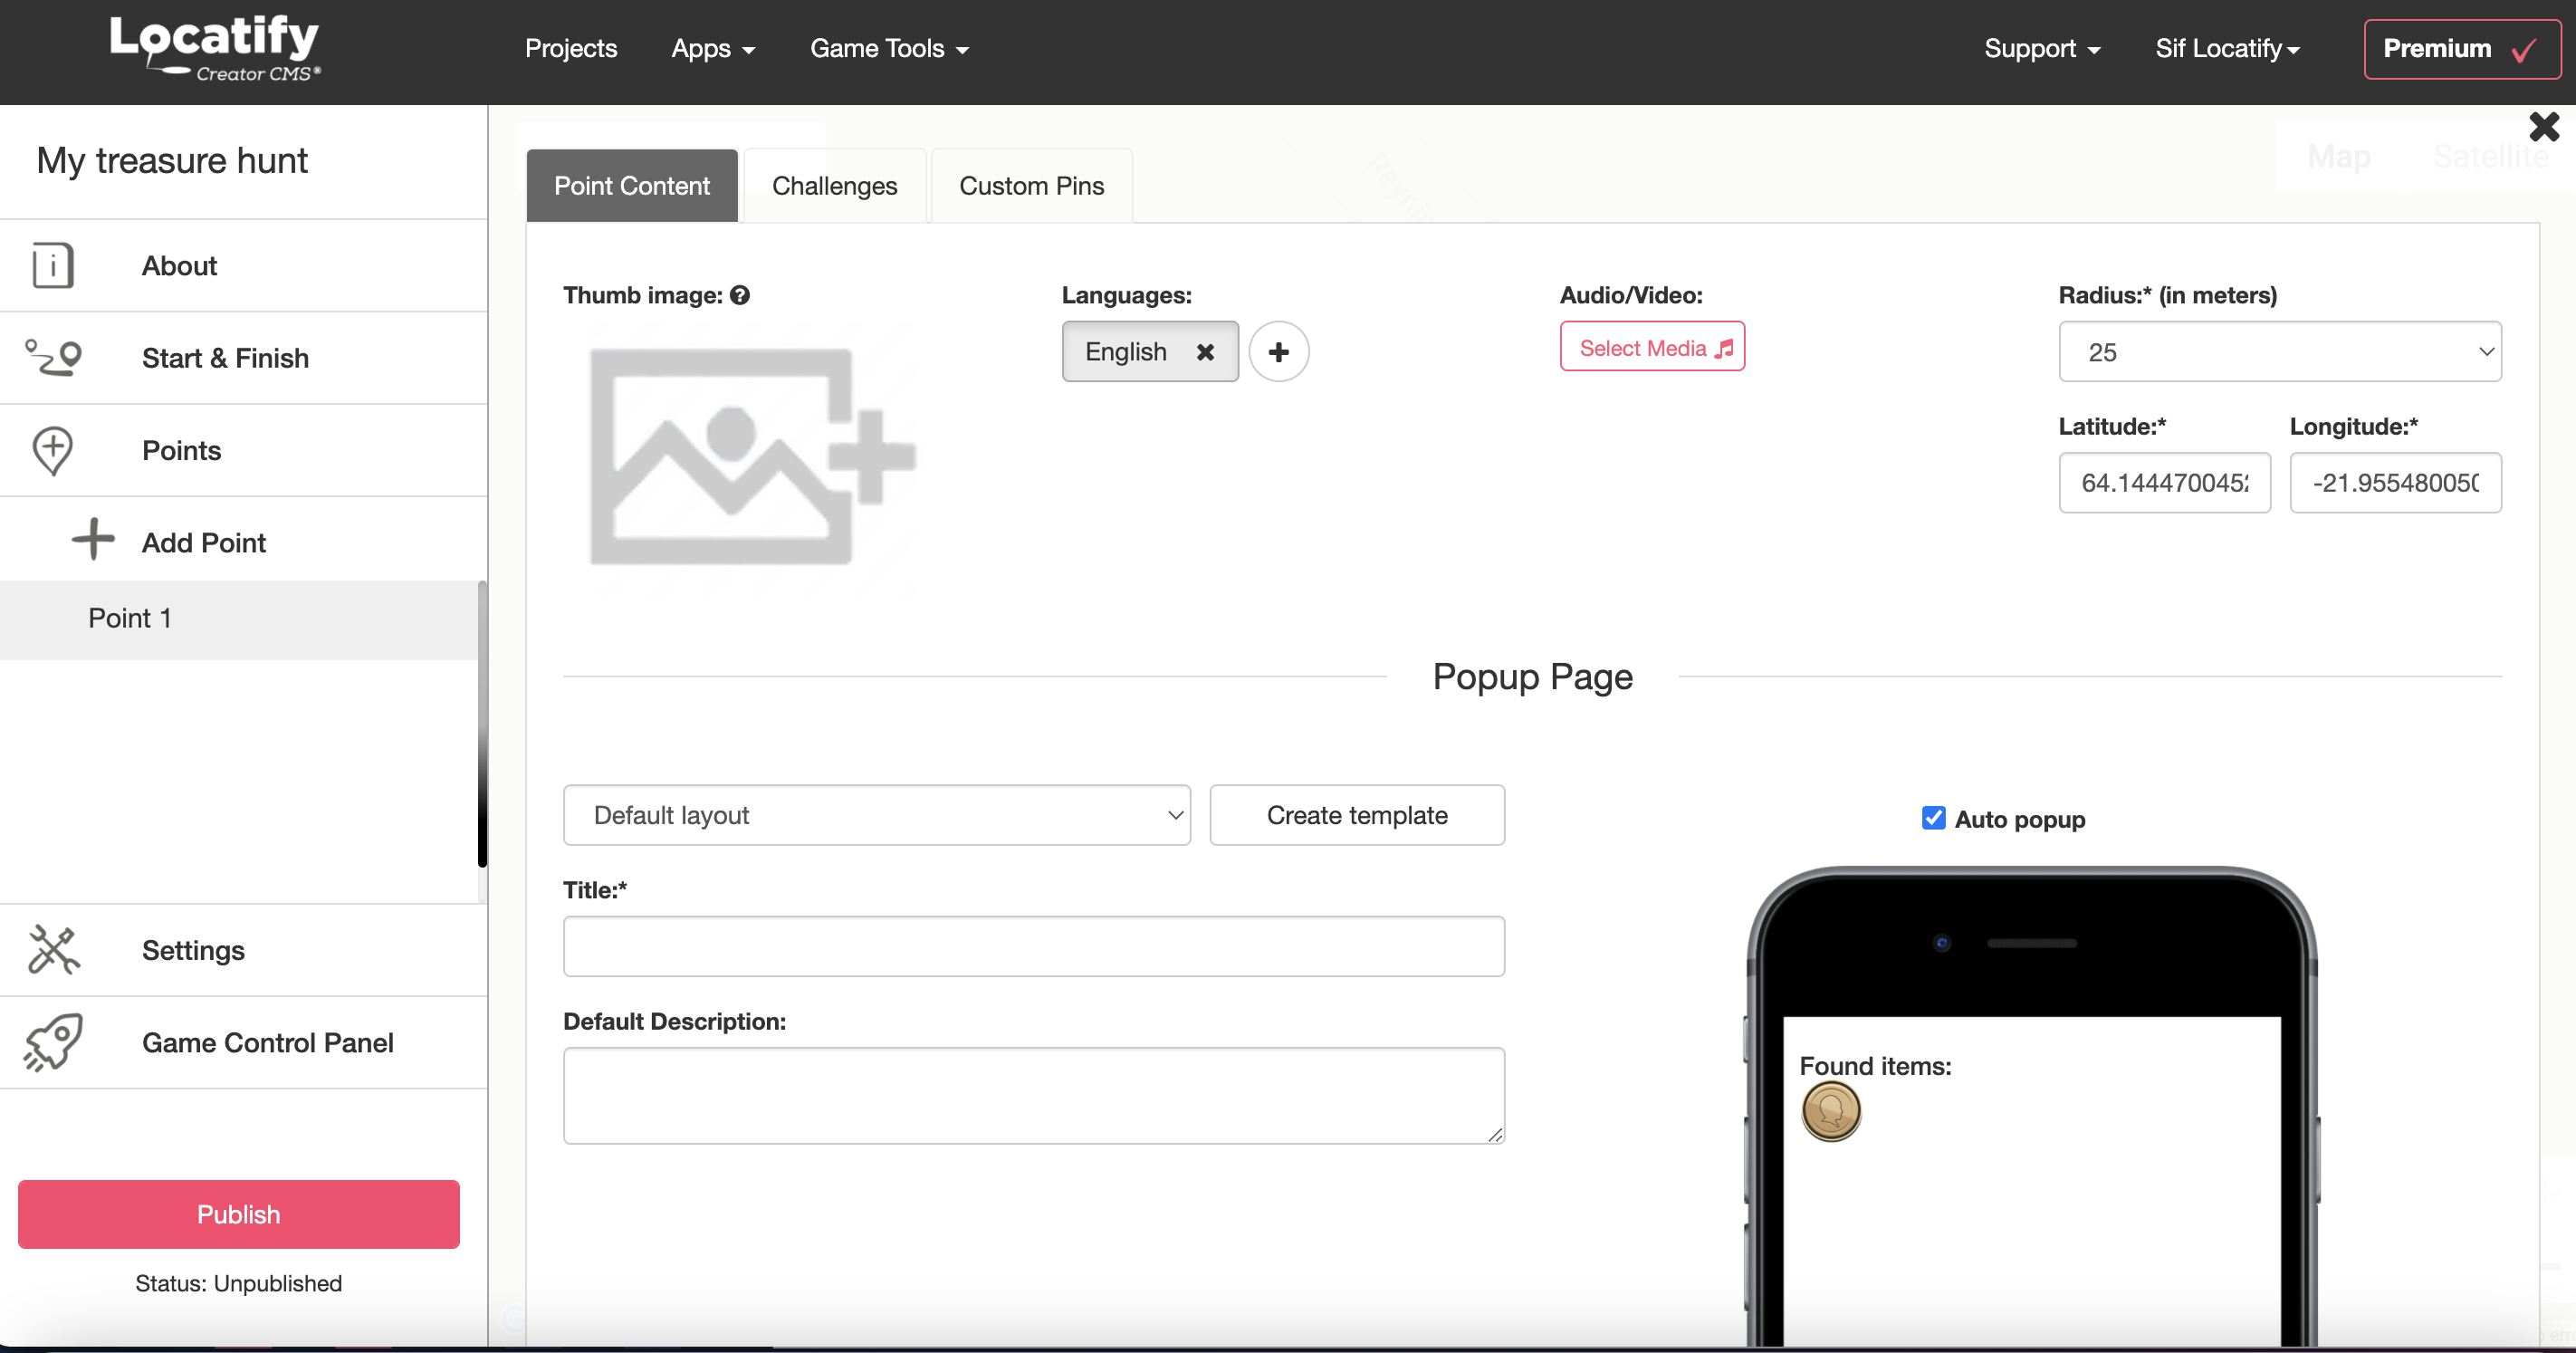
This is where you add the content that your players will see and hear in the game.
At the top you can:
- Insert a thumb image, like a logo or a photo
- Add more languages if you want (just remember to provide translations at all points and challenges)
- Add audio or video that plays when this point is activated
- Set the radius (the radius is the distance from the point that your players have to come within to trigger the points’ information) or set a more detailed position with latitude and longitude.
Popup page
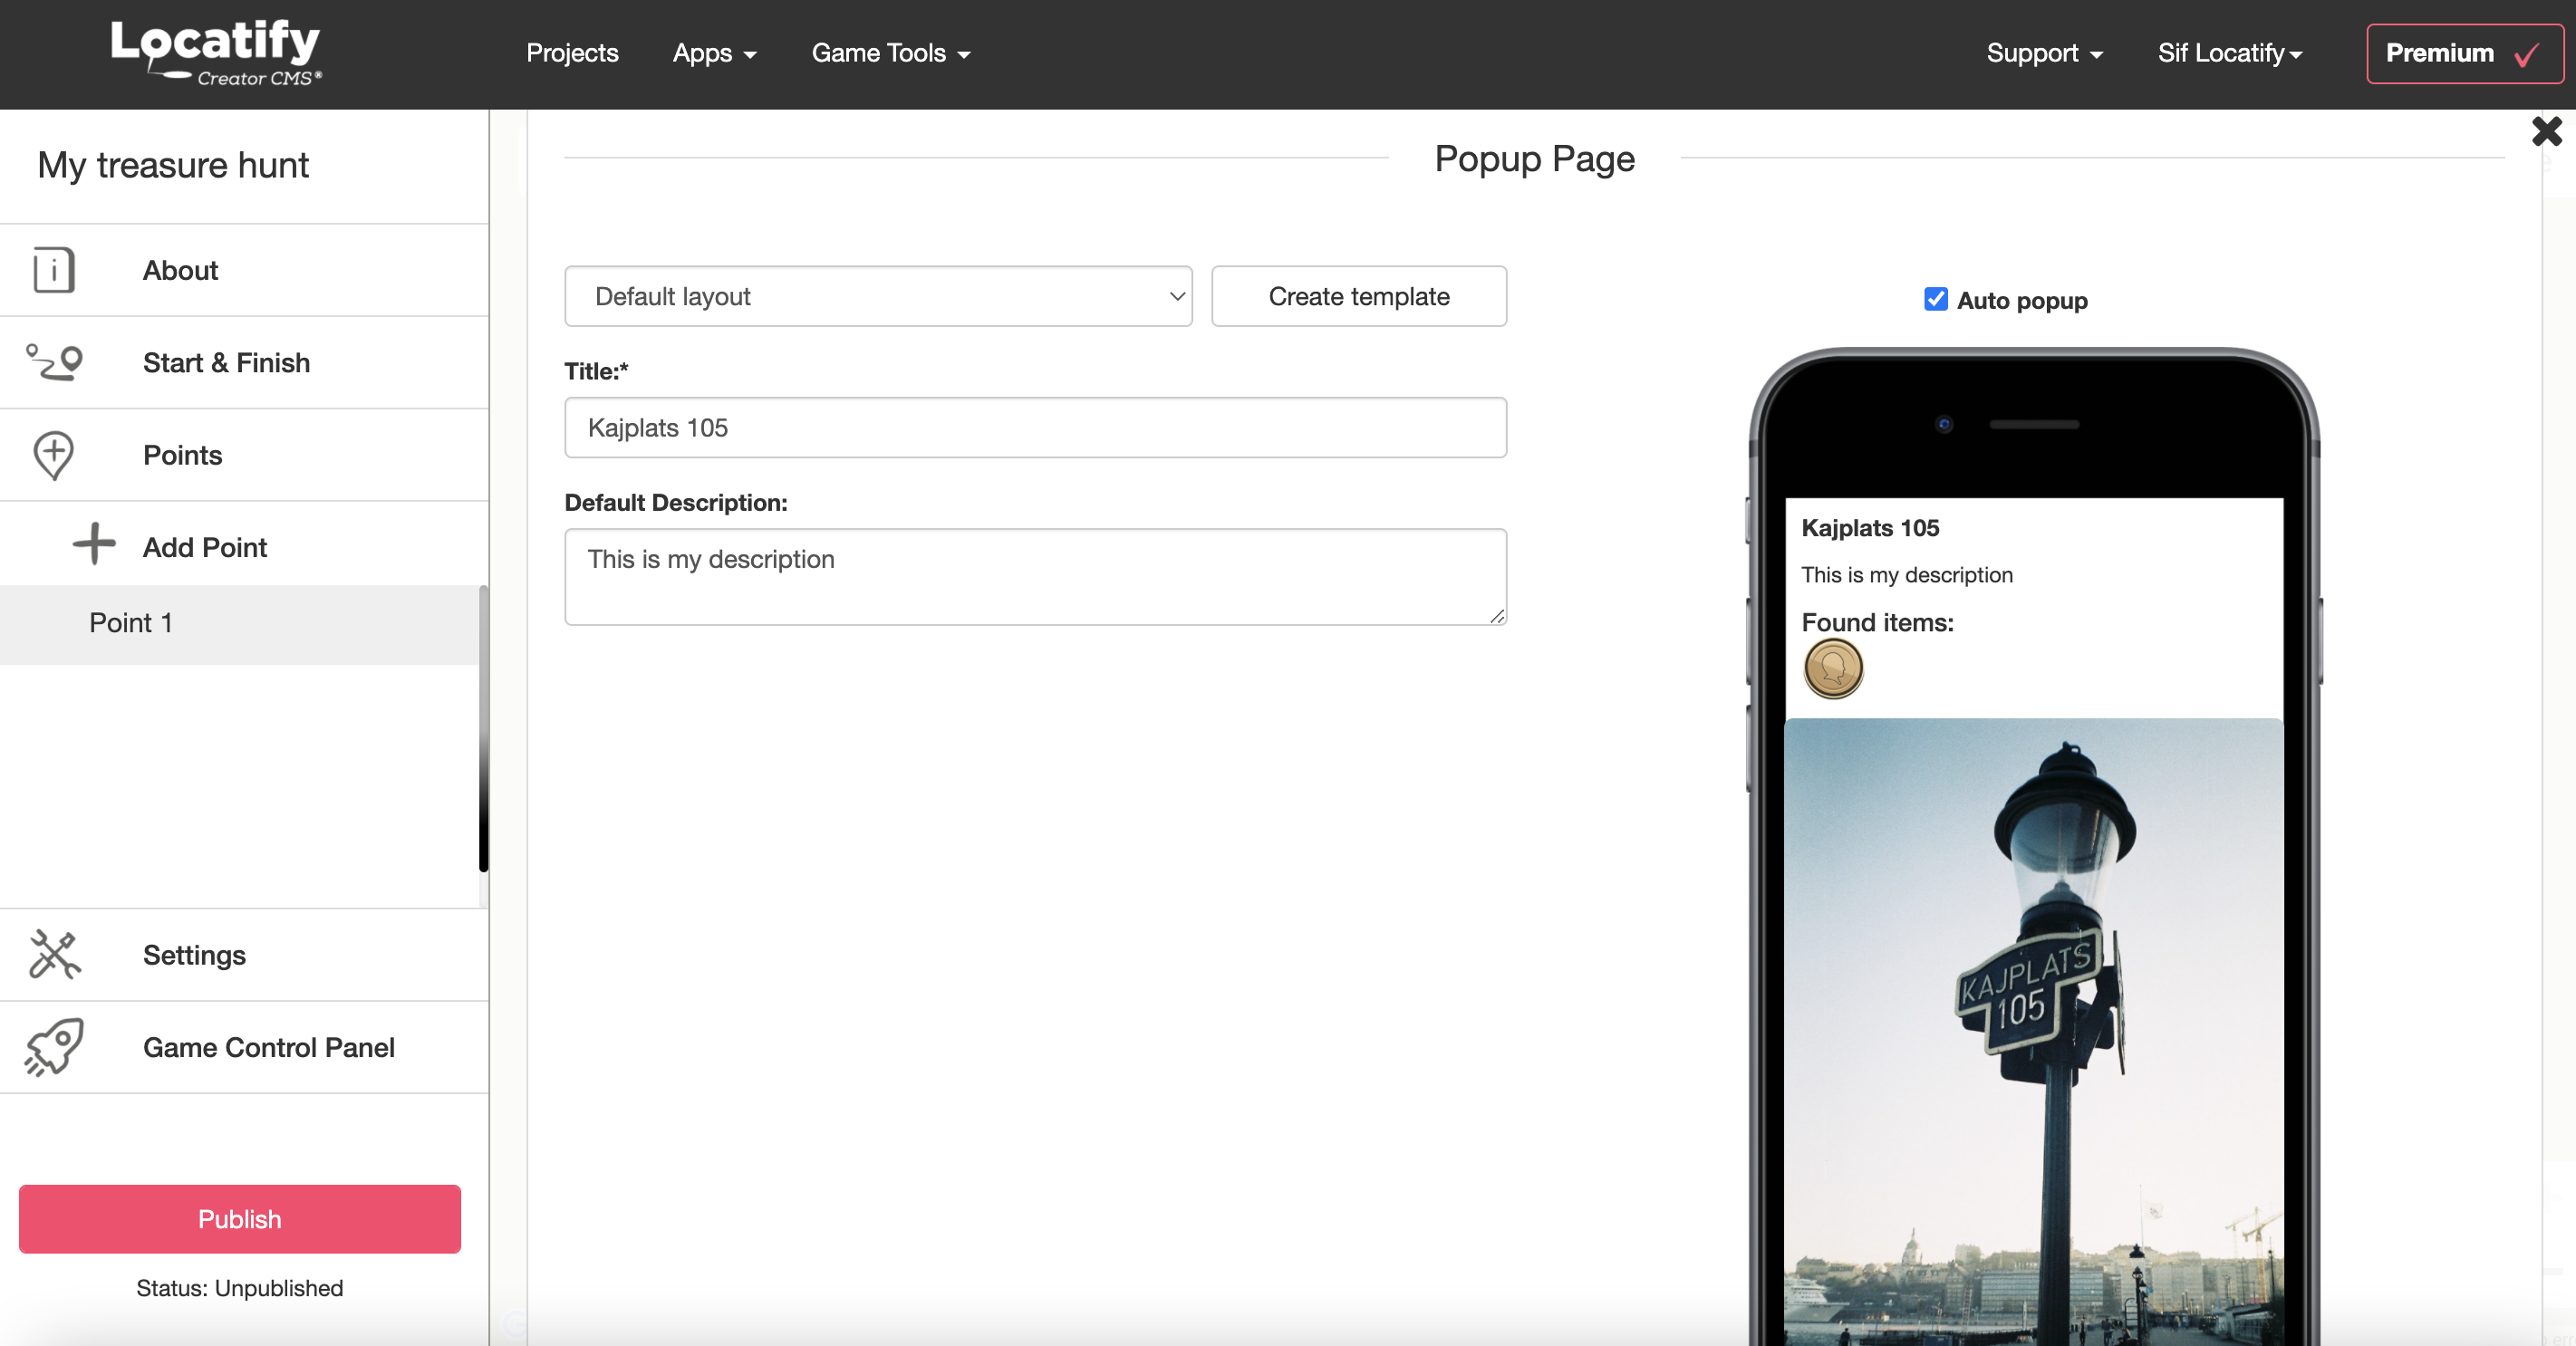
On the same page you’ll find the settings for the Popup page and you can choose if you want it to automatically open when the point is activated.
Here you add a title to the treasure and some description text.
If you have a Premium license, you can use content templates to further customise your point. For example, you can embed web content such as a YouTube video, showing store opening hours, and social media sharing.
4. Add Challenge
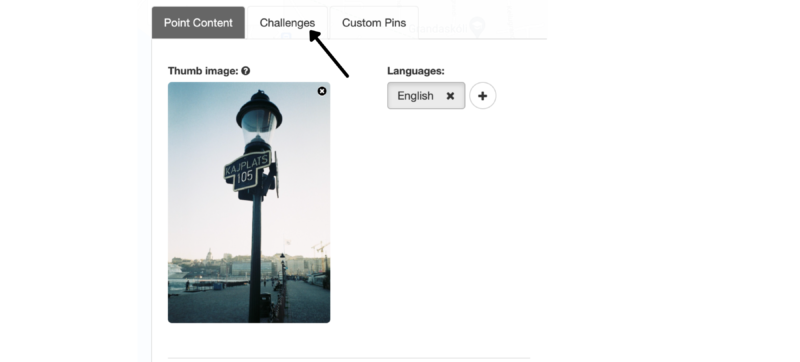
Now let’s add a challenge! Click on Challenges next to Point Content at the top of the page.
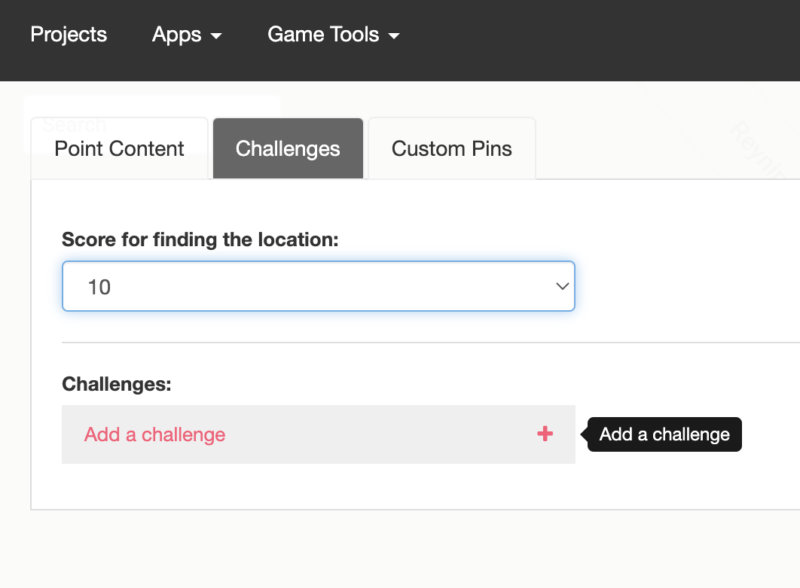
Start by attributing a score for finding this treasure location and then select Add a challenge.
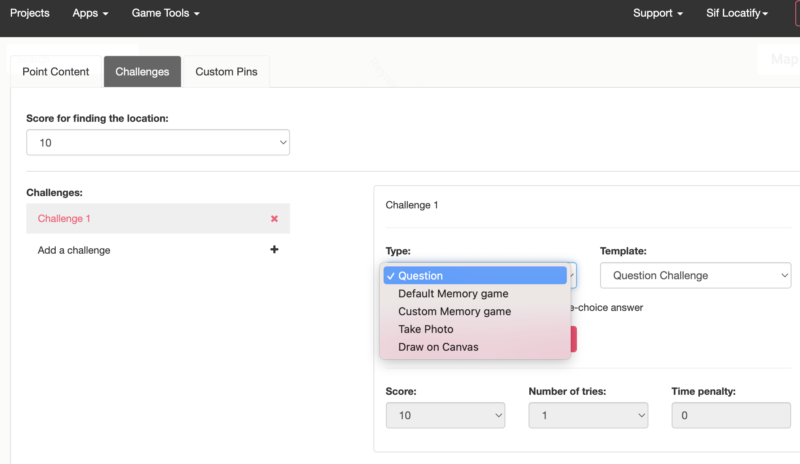
Choose your challenge type and don’t forget to select a score for completing the challenge successfully.
5. About section
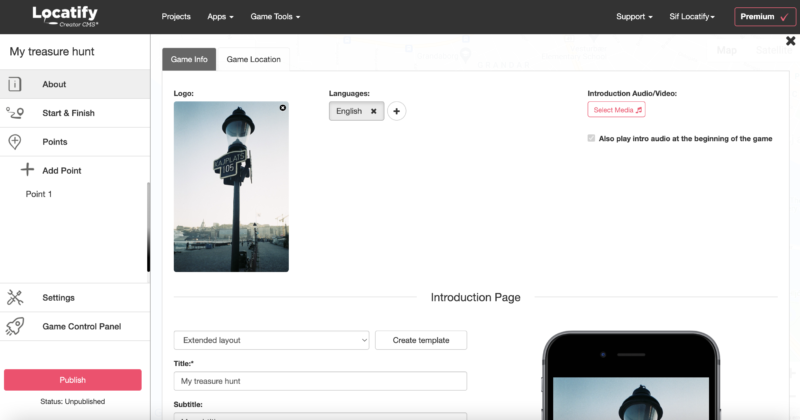
Now let’s go to the About section on the left side panel to get your project ready for testing and publishing. Here you find the information which your players will see when they first access your game in the Locatify TurfHunt app.
Let’s start by giving your game an image or a logo. You can also upload an audio or video file if you want an introduction before the player downloads the game (to reduce download time for your players, keep any video files uploaded under 30 seconds).
Introduction page
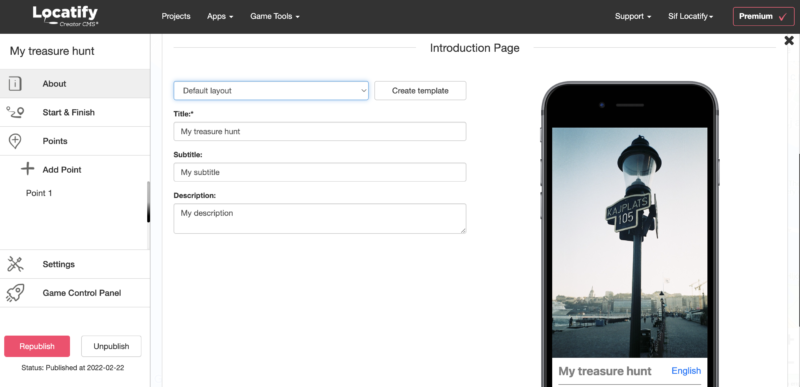
Let’s continue on to the Introduction page, where you can modify your title, add a subtitle if you’d like, and also add a description of the game.
With a Premium license, you can choose an extended layout template for more customisation, like adding additional slides, and changing the colour of the background, text and title.
6. Settings
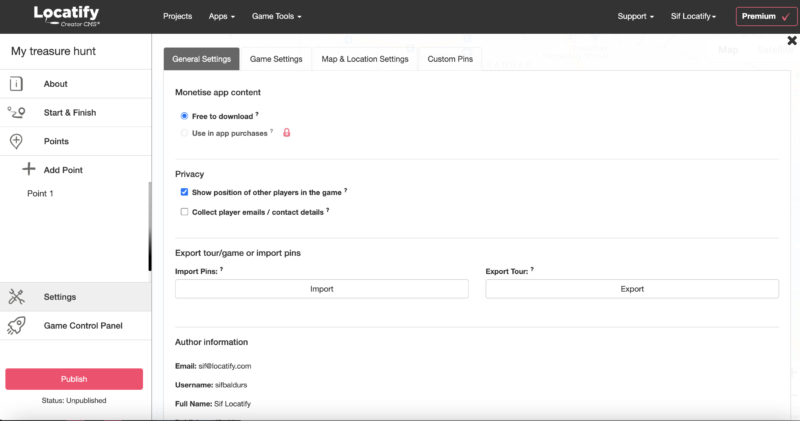
Now let’s check out the Settings. Under the General Settings you can decide whether or not to hide players’ positions on the map, choose if you want to collect players’ email addresses upon entering the game and import pins or export the game.
Game settings
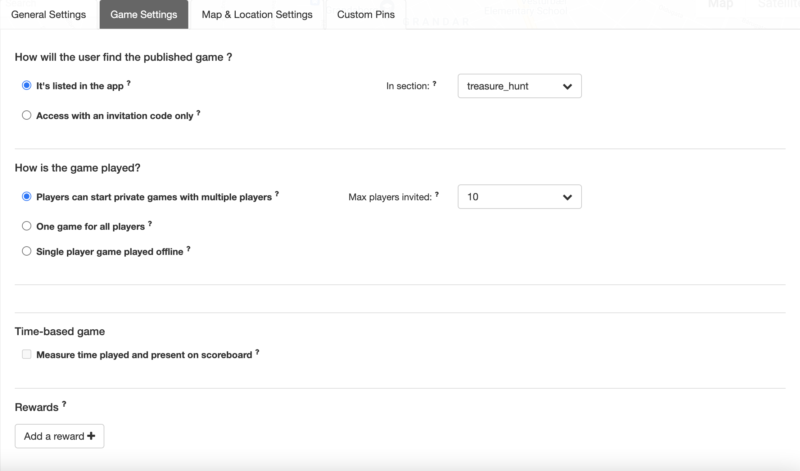
Under the Game settings you can specify the type of game, the maximum number of players and how players will join the game.
Games created on the free plan will always be accessible via the app’s home page, but with a premium license you can restrict access if you want, so that players need an invitation code to join the game. You can also change the game play mode and enable time-based games.
Rewards
Another premium feature are game Rewards, which are managed here. With Rewards you can reward players for finding a specific treasure location or earning a certain score.
Common uses for rewards are local discount vouchers or collectible digital items. This can be a great way to integrate local business sponsorship.
Map & Location settings
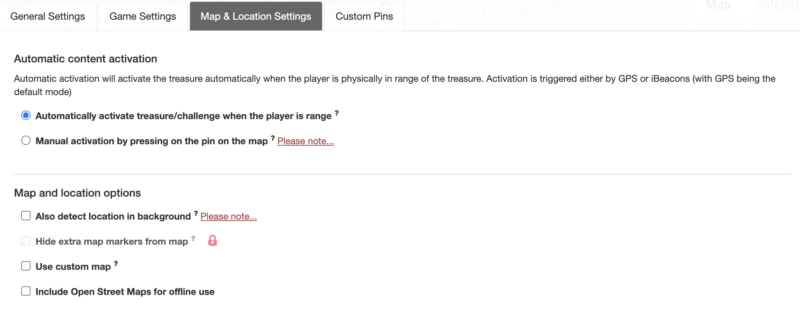
Under Map & Location settings you can choose if you want the content to automatically trigger when the user is in range or if you want it to activate manually. If you choose the manual activation the game is virtual and can therefore be played from anywhere.
You can also choose if you want to monitor the players’ location even when their device is locked, and add a custom overlay to your map.
7. Directions to Start and Finish
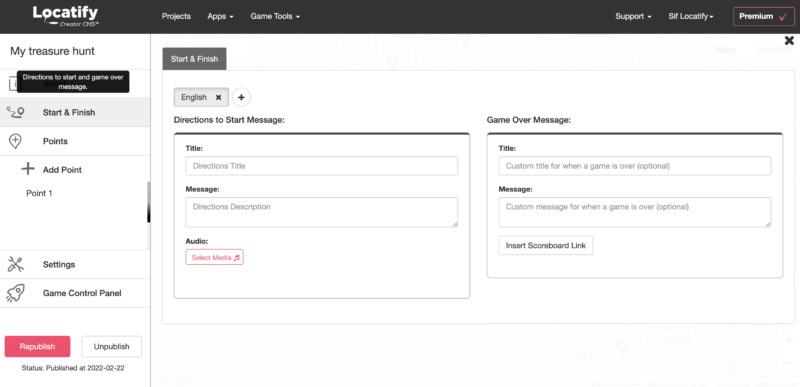
Click on Start & Finish on the left side panel to give instructions to your players on how to begin the game and add a custom message to your players for when the game has finished.
8. Testing
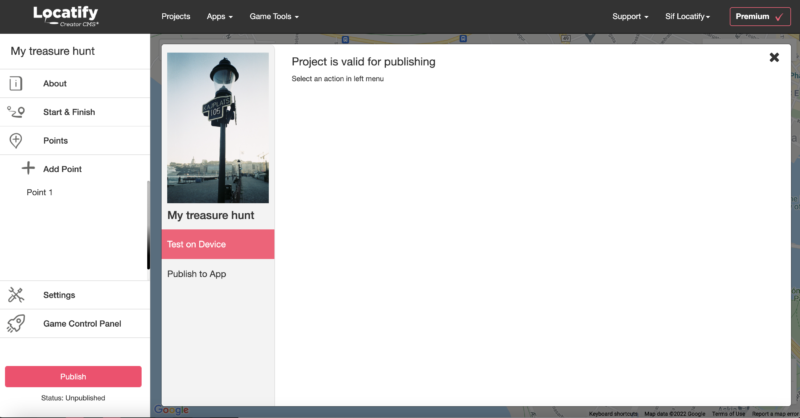
Now we’re ready to test our game. Select the Publish button on the bottom of the left side panel.
First, you will want to test your game, so click on Test on device. In this test mode you can test the game content without the need for going on location. But if you want to test the accuracy of the challenge locations it is recommended to test the game on location as well.
Keep in mind that test games can only be used once, so if you need to test the game on multiple devices, you will need to republish for testing again.
Create Test Version
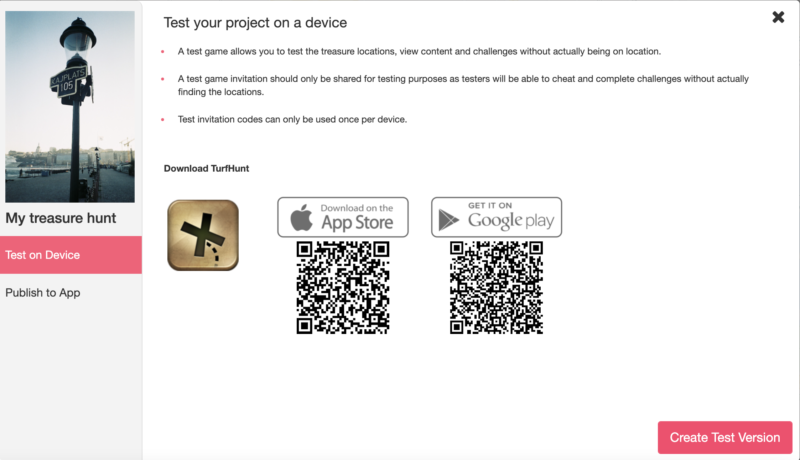
Now, download the Locatify turf hunt app to your mobile device from the App Store or Play store if you haven’t already. Select Create Test version.
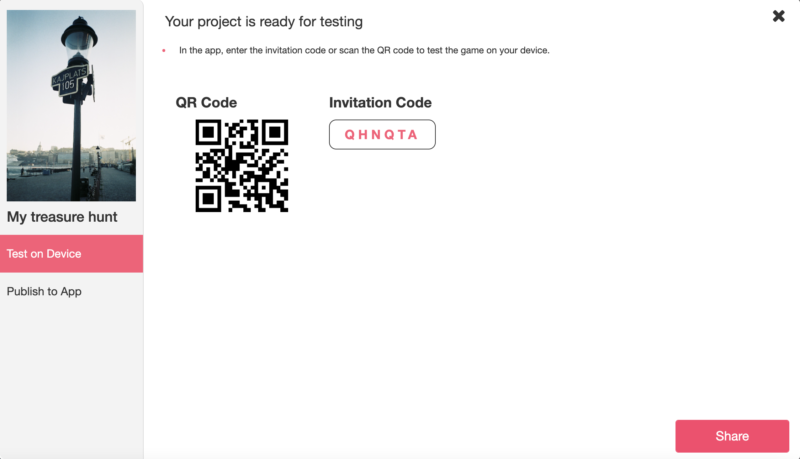
From within the Locatify Turfhunt app, you can redeem your test project with either the QR code or the invitation code displayed.
9. Publishing!
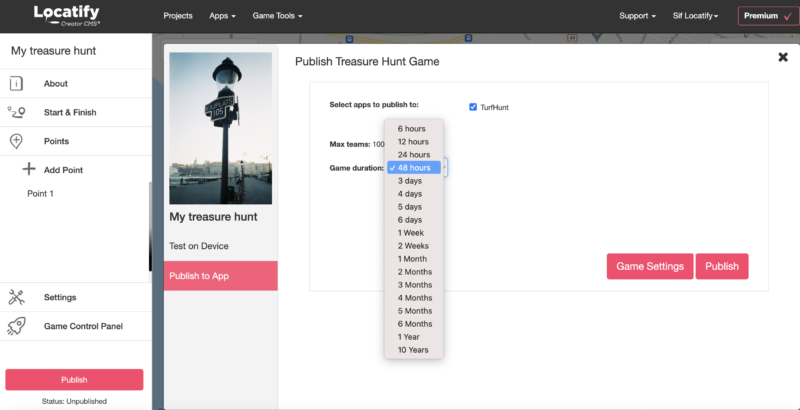
When you’re done with testing and ready to publish, select Publish to app on the left. Now you select the app for publishing (TurfHunt) and the game duration. You can also click on Game Settings if you need to go back to change the maximum number of players. When you’re ready press Publish.
Now have fun creating!
