Customer
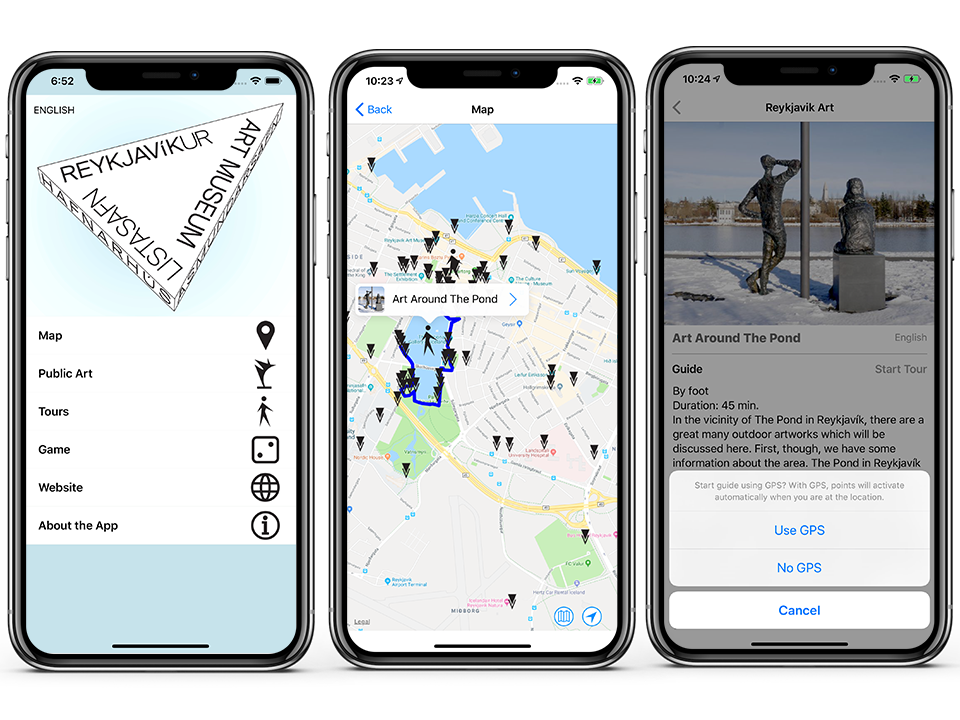
Reykjavik Art Museum is the largest visual art institution in Iceland. It occupies three locations in Reykjavík and takes care of roughly 200 public art pieces.
Challenge
Create an engaging, user-friendly and comprehensive guide for all of the Art pieces managed by the museum.
Solution
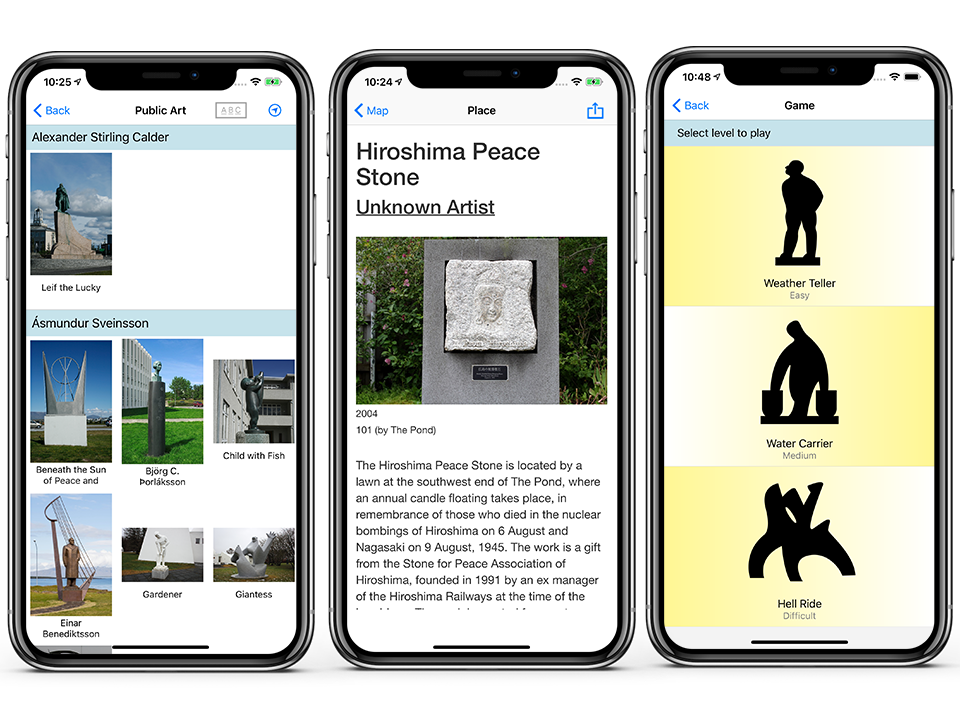
Locatify created a white-label AutomaticTourist Guide app with maps and GPS. The app features 200+ points of interests which are displayed on a map and in a list view. Users can navigate to each art piece and view extra information or can embark on a curated walking tour or play a quiz game to learn more bout the art pieces.
Testimonial
“It was a great pleasure to work on the app on art in public space in Reykjavik together with Locatify. They were very co-operative and flexible, responded quickly to messages and were always ready to talk on the phone if needed. According to their recommendations, we used the Trello project management system to work together, a very convenient and clear system, and a great help in planning. Thanks for helping us make the app a reality and for a successful collaboration!”
– Reykjavik Art Museum Team
Download the App
Get the app for free on Android and iOS ✨